Master Watchmaker, Clockmaker and Jeweller (since 1981)

nick@clockmaker.com.au
Suite 403, Level 4, Culwulla Chambers
67 Castlereagh St. Sydney 2000 NSW Australia
Phone: (02) 9232 0500 Fax: 02 9233 2273

| Chapter 7: Disassembly of the Time Display Unit
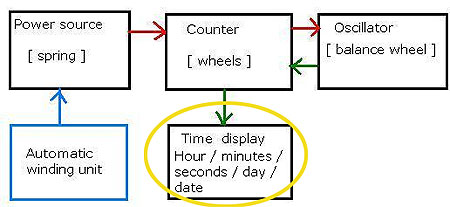
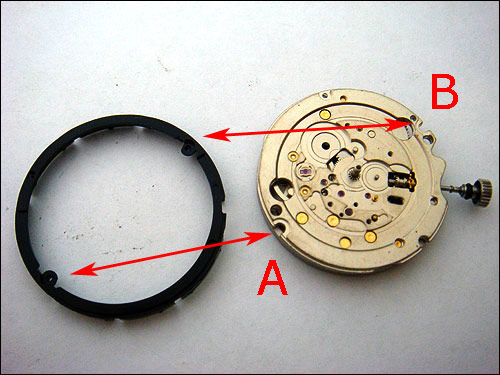
Now that we got our movement out of the case, we are ready for more serious disassembly. To refresh your memory: a 7S26 movement consists of 5 major units. In this chapter we will cover disassembly of the time display unit.
The time display (TD) unit consist of the following components:
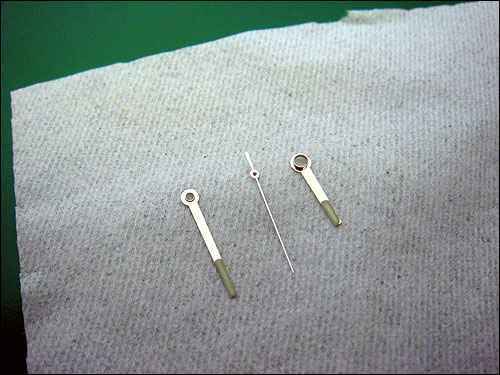
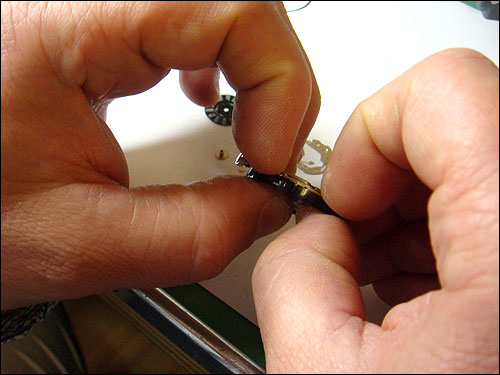
- dial and hands For more details and part numbers, refer to Parts Catalogue, page 2 position 1-15. Since dial and hands are not movement-related components, they are not listed in the movement parts catalogue. NOTE: most components in the TD unit are made of plastic. Plastic is not a traditional "watchmaking" material but like many other manufacturers of mass produced watches, Seiko has opted for plastic components due to lower production costs and lower maintenance requirements. Unlike metal wheels, plastic wheels require no lubrication. Unfortunately plastic wheels are easily damaged and destroyed when handled inappropriately. Also they are far less forgiving when they are not placed correctly - even a relatively small amount of force can cause permanent damage if the wheels are not free to rotate, bent or misplaced. Failing to follow disassembly instructions will result in permanent damage. The first step in disassembly is removal of the hands and dial. Tools: hands removal tool, tweezers, screwdriver size 80. Hands removal tool is a simple yet essential tool which is correct for hands removal.
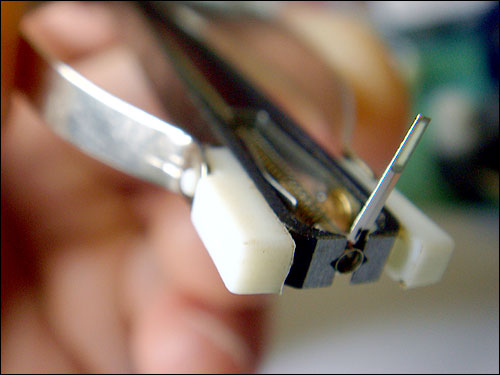
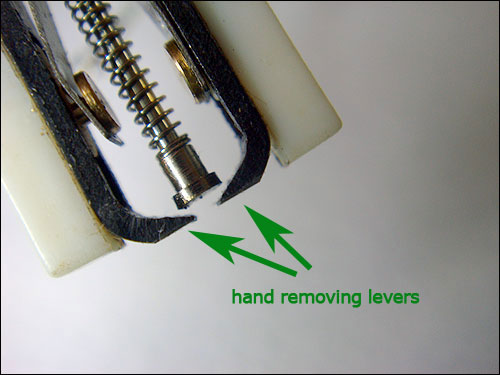
The core of the tool are two specially shaped levers. When springs are squeezed together, the levers are pushed against the dial upwards and the friction-fit hand is removed from its wheel.
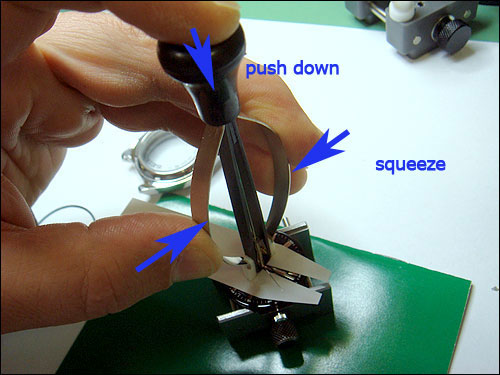
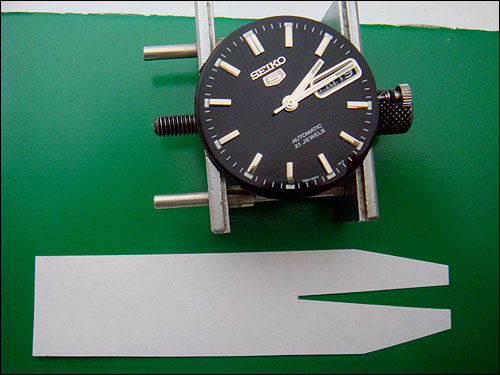
Hands removal procedure: With the mechanism placed in the movement holder, set the time so that the hour, minute and sweep seconds hand are "over each other," like in the photo.
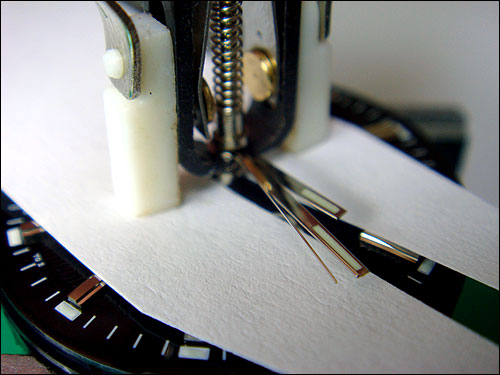
In order to protect the dial from scratching (when in contact with the hands removal tool) make a paper dial protector as per photo. The next step is crucial: place the levers of the hands removal tool UNDER THE HOUR HAND.
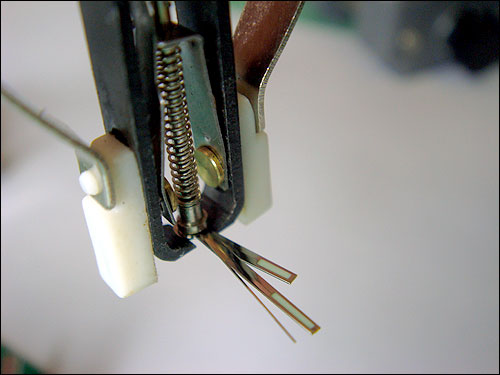
Note: the common mistake is to place the levers between the hands - for example, one lever underneath the hour hand and other between minute and second hand. Such placement is INCORECT and will result in damage! With the squeeze of springs, all 3 hands will be lifted at the same time. Another tip: make sure that tool is positioned vertically (not under an angle). Note: once the tool springs are squeezed and hands are removed, DO NOT RELEASE PRESSURE! If you do, the hands will most likely fly away never to be found. The proper action is: squeeze-remove hands-keep the tool squeezed-bring it down to the bench surface-release the pressure. The photo below shows the moment after removal, while the squeeze is still maintained.
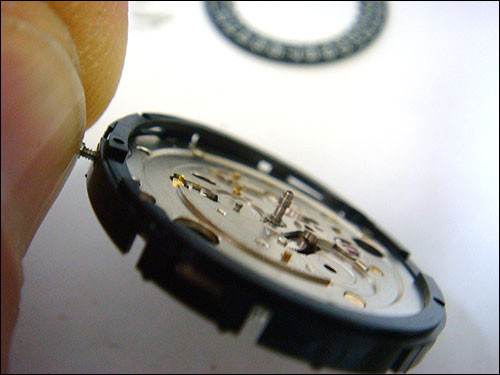
Hands removed! Remeber not to touch the dial! Fingeprints are very difficult to clean off the shiny dial surface!
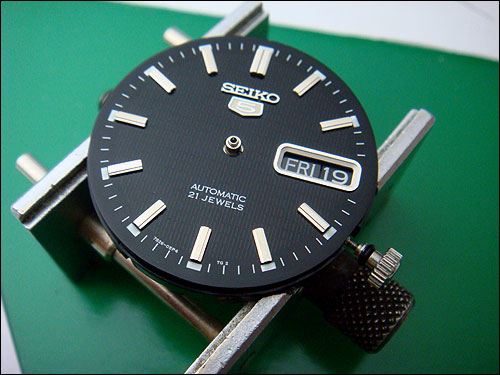
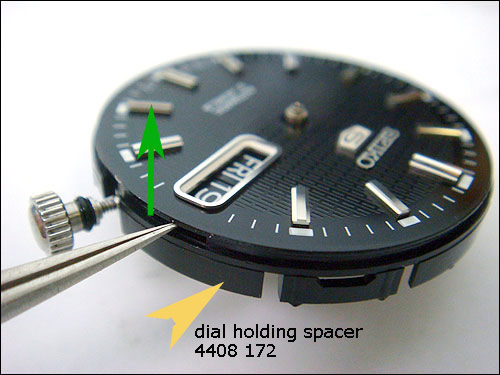
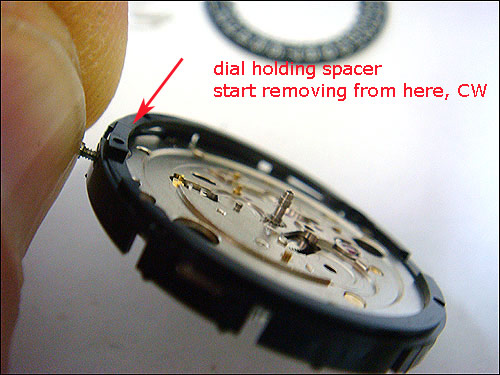
Next step is to detach the dial from it's holding spacer. The dial has two feet which are pushed into the spacer. To lift the dial, place tweezers in cutout underneath 3 o'clock position and rise the dial very gently for approx 5mm.
Rotate 180 degrees and again, unsing tweezers as lever, lift the other of the dial.
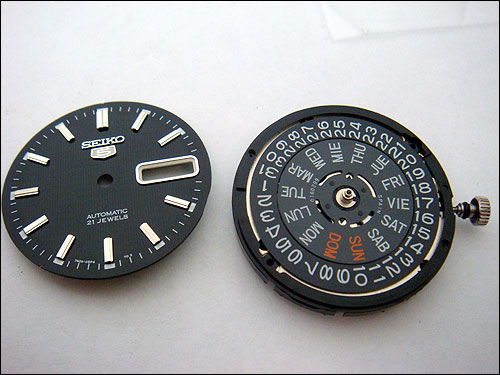
Place dial in a small paper bag and store away.
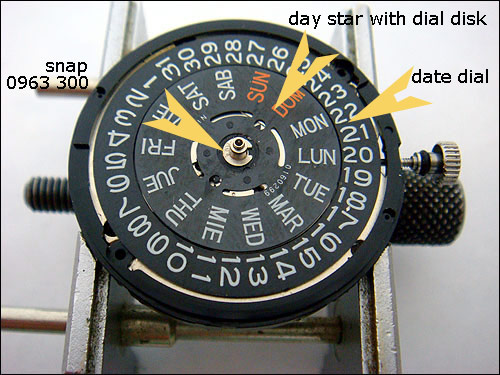
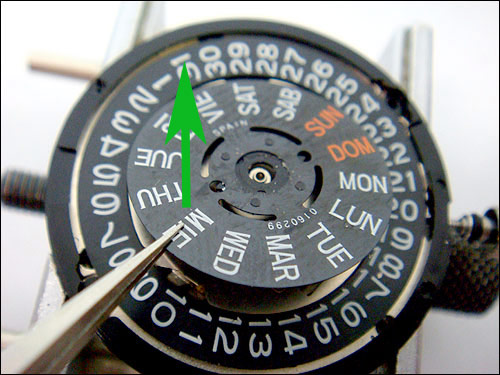
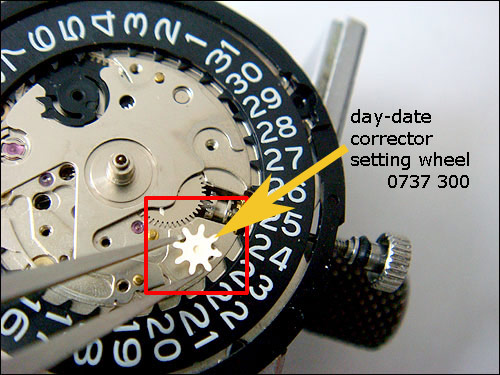
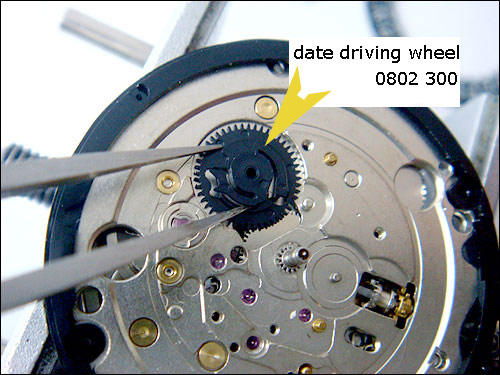
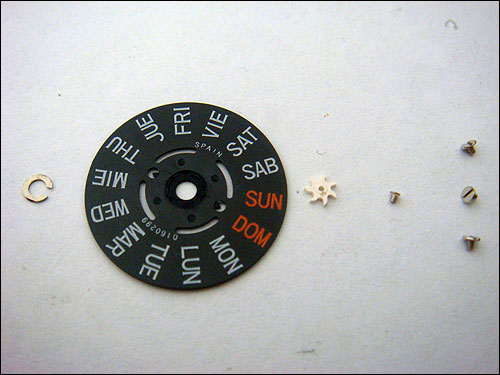
Next step is removal of the Day star with dial disk (day dial). It sits on top of hour wheel and it is secured in place with a "snap".
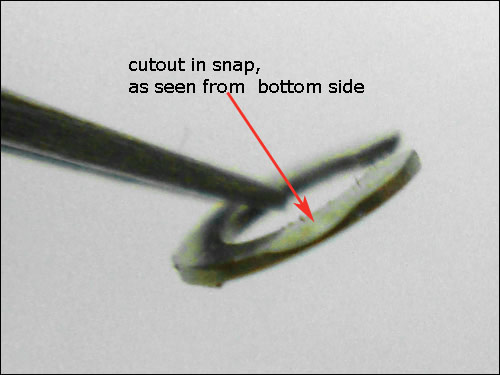
Snap is really a C-clip which slots into the hour wheel. With tweezers, align the cutout in snap with the stem as per picture.
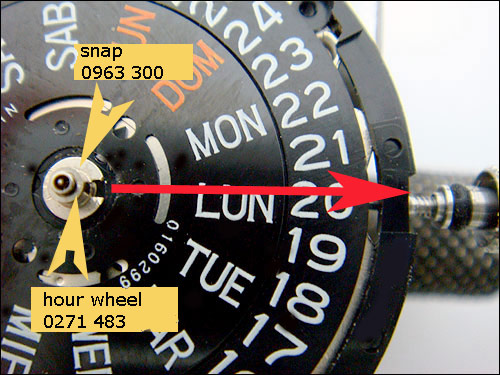
To remove snap: place screwdriver underneath the snap EXACTLY 90 degrees from the cutout and twist very gently. Be careful! You need to position the screwdriver in a cutout which is located on the bottom of the snap. See photos below for enlarged shot of the snap. BEWARE: do not push or pull the snap. Any attempt to remove it in any other position than shown in the photo will result in damage to the very thin day dial. The snap must remain in shape, if bent it will not hold the day disk properly or it will not provide clearance for free rotation. However when removed as described, it will remain in perfect shape.
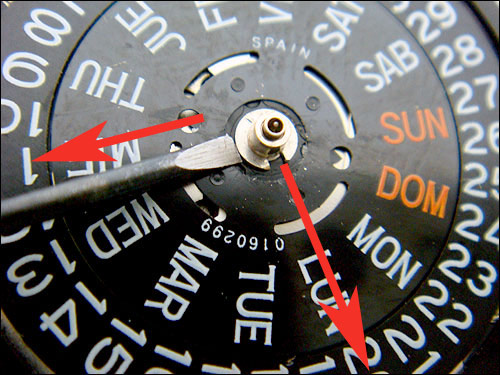
Here is another shot of the snap, showing the cutout to accept the screwdriver.
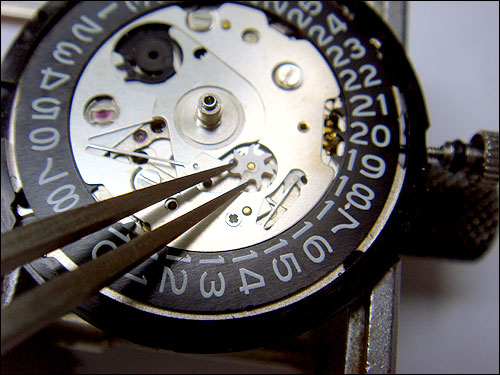
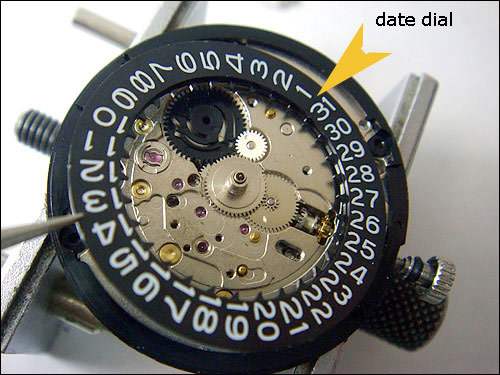
Remove the dial disk.
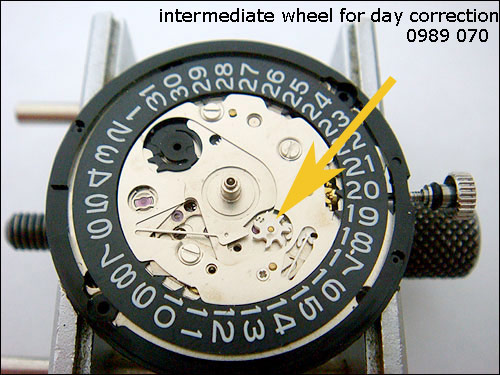
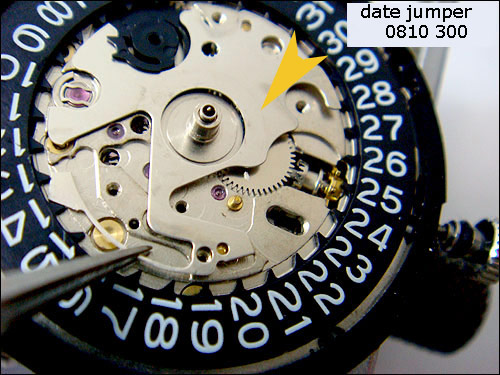
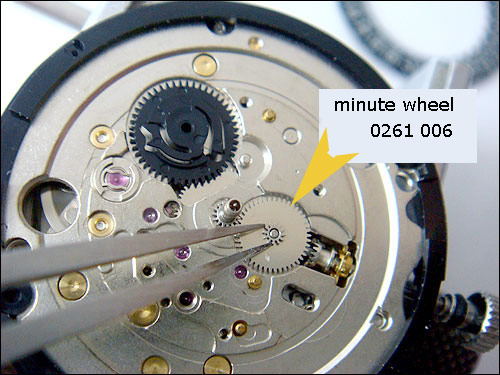
Remove intermediate wheel for day correction. This wheel is held in place by the day disk so you can just lift it up form it's arbour. NOTE: this odd-shaped plastic wheel is very fragile, try to avoid touching the tooth!
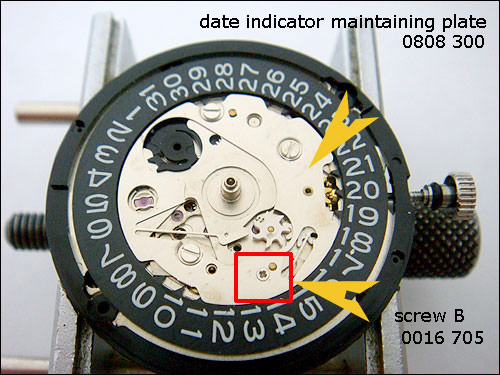
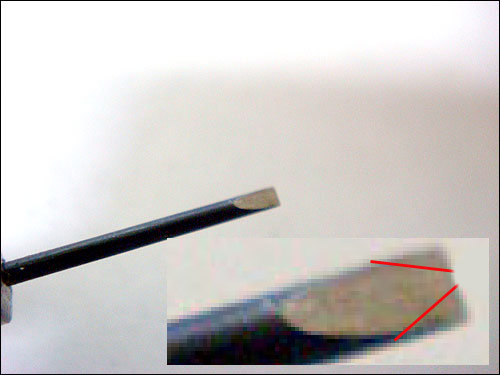
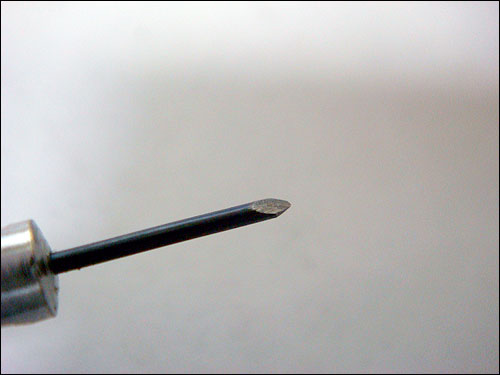
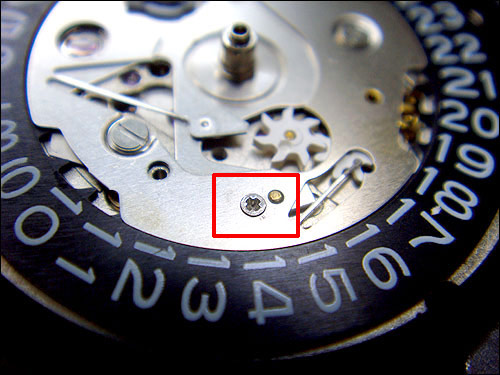
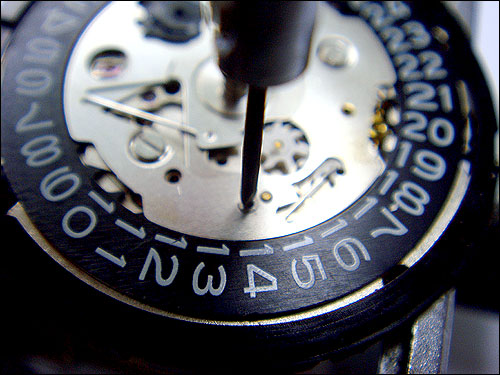
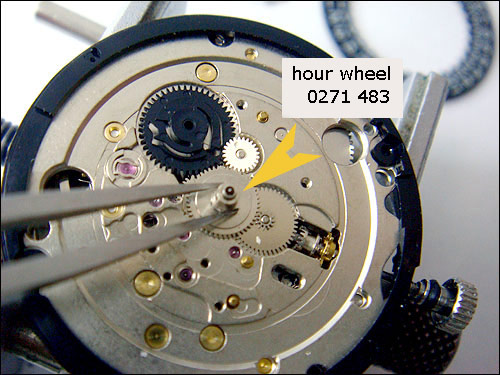
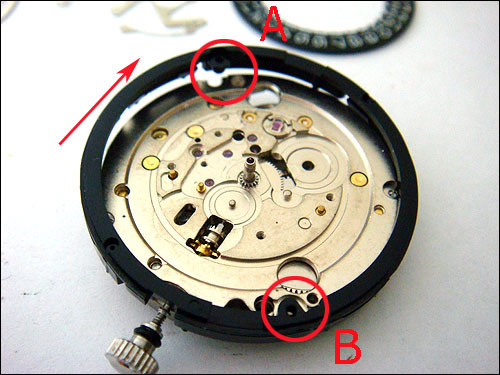
We are now going to remove another layer of wheels which are held in place by the date indicator maintaining plate (for shor: date plate). The date plate is held secured in position with 4 screws (3x A type and 1x B type). First we will unscrew one B type screw, part number 0016 705. It is a phillips head screw. (Another unorthodox component!). To be able to remove this screw, we would have to make a tool - a "halh phillips head screwdriver". :-)
Place a sheet of medium coarse (400 or 600 grade) sand paper on to a flat surface and shape the blade of your smallest size screwdriver (40 or 60 / 0.40 or 0.60mm) as per photo.
|
|
Previous Chapter | Home | Next Chapter
|