Master Watchmaker, Clockmaker and Jeweller (since 1981)

nick@clockmaker.com.au
Suite 403, Level 4, Culwulla Chambers
67 Castlereagh St. Sydney 2000 NSW Australia
Phone: (02) 9232 0500 Fax: 02 9233 2273


| Chapter 8: Disassembly of the Automatic Winding System - "The Pump"
In the previous two chapters we have undertaken disassembly
of our movement without much explanation as to what particular components
do and how they are related to each other. We will get back to that during assembly.
However the auto-winding system (AW) should be studied more thoroughly
before being pulled apart.
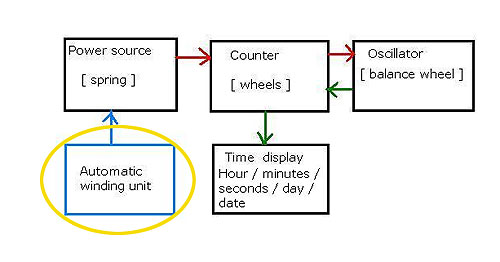
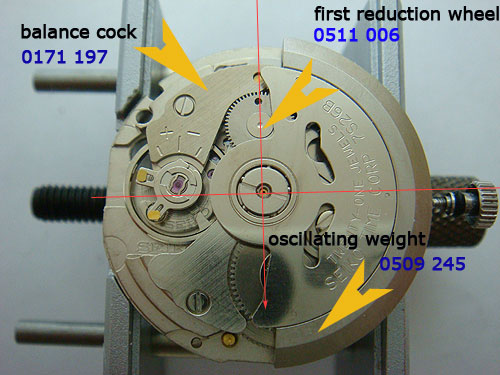
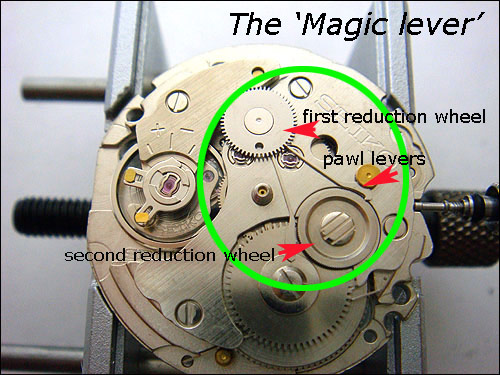
The AW unit contains the following components:
NOTE: the first reduction wheel and pawl lever are secured in place underneath the barrel and train bridge so we will remove them
off the bridge later on. DO NOT DISASSEMBLE this bridge as yet - for the sake of tutorial,
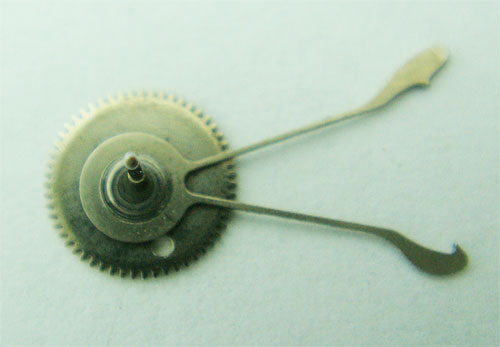
I have taken images of the pawl and first reduction wheel removed from another Seiko movement!
The AW unit components are shown on page 3 of the technical manual, position 16, 17 and 18 and page 4, positions 27-3, 27-4 and 27-5.
In chapter 5 we learned what the purpose of the AW is.
Now we will concentrate on how it works in the Seiko Cal. 7S26.
Here is the basic concept: The spring can be wound in only one direction because it is locked (or held under tension) with a simple ratchet locking system. Therefore, in order to wind the main spring, the auto unit must provide unidirectional cirular winding motion to the ratchet wheel.
That motion comes from freely-rotating oscillating weight.
And since the rotor "spins" in both directions, we need a translator to
turn the bidirectional circular motion into unidirectional rotation.
Seiko employs the pawl lever system and they call it the "Magic Lever."
The Magic Lever is a very well designed. A simple and clever translator
and it is finely executed. It is very efficient, it requires
a rotor with lower mass and operates flawlessly for many years with
very low maintenece. Actually, Seiko 5's auto-winding system is
by far superior to many similar systems by Swiss watchmakers!
For that reason alone, every student of horology should take time
to understand how it works.
But we get into that in just a minute. Because the magic lever is located underneath the rotor, we will remove the rotor to have a clear view to study its action.
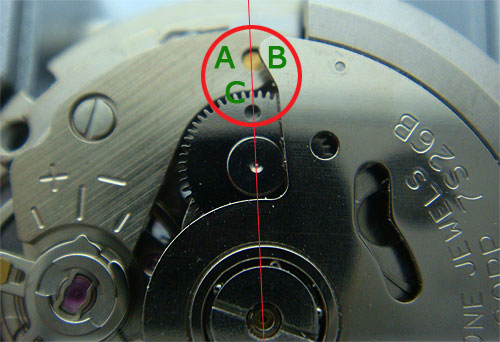
The first step is to note the positional alignment between the oscillating weight and first reduction wheel. In Seiko 7S26, the rotor must be installed correctly in order to perform as designed.
The alignment mark is a gold circle on the balance cock, marked A.
The tip of the rotor (positioned as per photo, stem side) is marked B.
And the circular cut-out on the first reduction wheel
must be on the top, C. All 3 componets are aligned as per photo.
This is explained in the technical guide, page 6 paragraph 18 but
dare I say my image makes more sense :-).
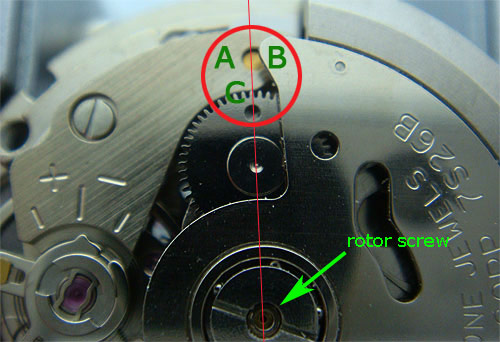
To remove the rotor, unscrew large screw in the center.
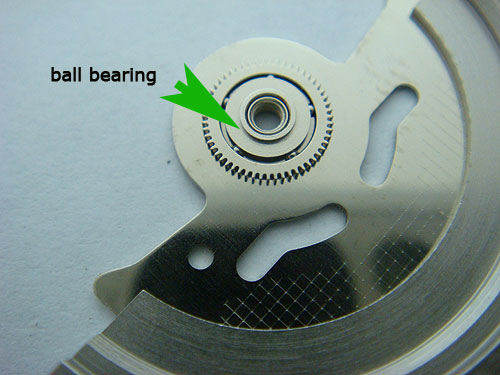
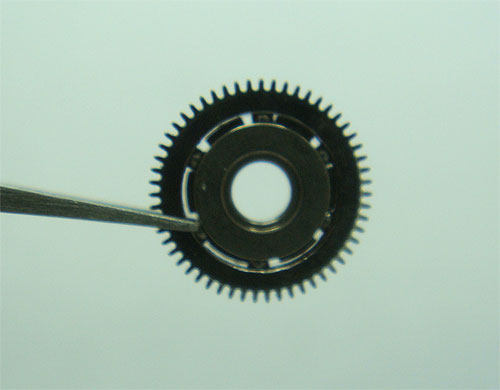
Here is another shot of the rotor with the ball bearing.
I have removed a bearing from Seiko calibre 7009 to show you how it looks like but this is not part of the DIY.
The bearing is only supplied with oscillating weight as assembly anyway.
(BTW, can you note the difference between the two ball bearings?)
We can now have a closer look at how the magic lever works.
First, it consists of 3 components:
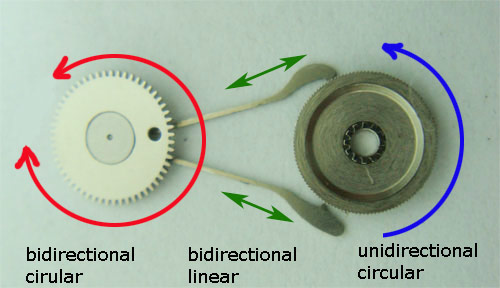
Because the rotor motion is directly transferred to the first reduction wheel, it too rotates in both directions.
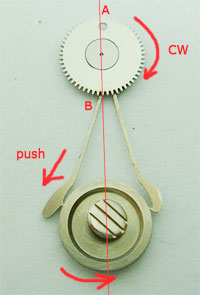
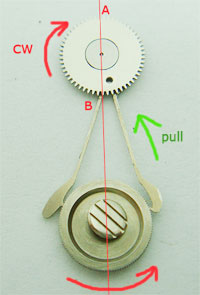
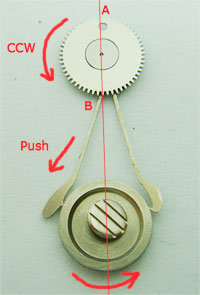
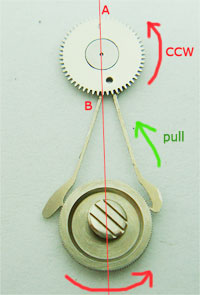
Pawls are attached underneath the wheel, off-centre so that the levers move in a linear direction pushing and pulling the second reduction wheel.
The specifics of this design is in detail: depending on the position of the first wheel, when one lever is pushing (or pulling), the opposite lever is locking. In other words, each lever is either pulling or pushing, but both levers can act as a ratchet. Clever!
Such an arrangement provides two direct benefits: both clockwise and anti-clockwise rotation of the rotor
will wind the main spring and the second wheel only rotates in one direction - exactly as required to wind the main spring.
Another photo of the off-centre arrangement.
First thing to note is that the winding system is symmetrical with two different cycles and
since the rotor is bi-directional, there are 4 distinctive stages of winding,
as shown below.
...and regarless of the motion of the first wheel, the second wheel always rotates in one direction!
|
 |
 |
 |
 |
|
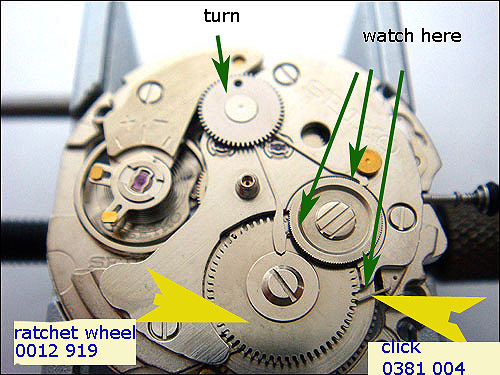
TO DO: while turning the first reduction wheel, observe
- how the pawl lever transfers motion to the second reduction wheel,
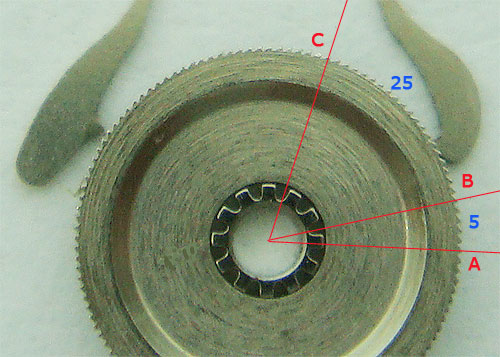
Watch repairer's tip: As the first wheel travels 180 degrees (form A to C) the second wheel advances for 5 teeth. Therefore after 5 half rotations of the rotor (2 and a half full rotation), the second wheel will advance 25 teeth (A-C) and the ratchet wheel will 'click' once. This calculation applies to winding of a spring which is not fully wound. When the spring is fully wound (maximum power reserve) the spring will "resist" the wind and it will take approx. 6 full rotations for one ratchet click. Those two parameters are important when assessing the action of the pawl levers. If the pawl is slipping (levers slipping when pushing or pulling) there will be inefficient winding action and both pawl and second reduction wheel would need replacement. This is often the case with movements which run for many years without an overhaul.
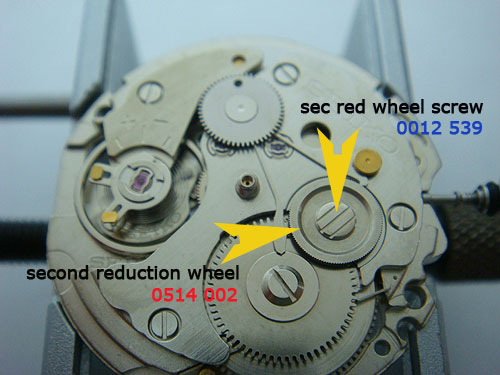
Finally we are now ready for disassembly. Unscrew the second reduction wheel screw. NOTE: Three slots on the screw head means that this screw needs to be turned clockwise to unscrew (left-handed thread) Remove second reduction wheel. This completes the disassembly of 3 components in auto winding unit. ATTENTION: Do not unscrew ratchet wheel screw [0012 9191].
|
|
Previous Chapter | Home | Next Chapter
|
 nick@clockmaker.com.au to confirm that you have successfully completed disassembly and study of the auto winding unit. Remember: subject line must start with DIY.