| Chapter 9: The oscillator and the gear train
In this chapter we will continue with the disassembly
of the remaining units, starting with components in the power source unit,
then the oscillator and then we will disassemble the counter or train wheels.
In addition, the last step is to pull apart remaining components in the time and calendar setting assembly.
There are a couple of potential 'booby traps' so please read the entire chapter before
proceeding with disassembly.
We have also reached the stage where we will have to remove
bridges or plates which hold the components in place.
It is important to understand that once screws are removed,
the bridge is still secured in place because it's held by alignment pins.
Therefore most bridges must be 'lifted' from the main plate 2-3mm
before being removed. Placing a screwdriver at that exact point is
necessary in order to avoid any potential damage to the
components underneath the bridge.
Another important thing is to hold the components with tweezers at a certain point
(for example it is fine to hold the large pinion directly with tweezers, but that would
be inappropriate for smaller ones). If in doubt, refer to photo.
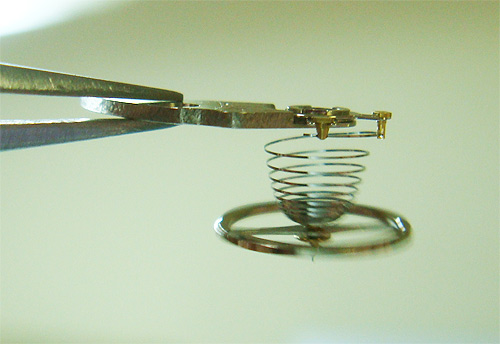
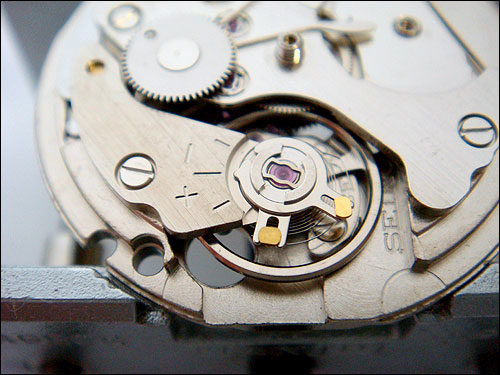
The most sensitive of all components is the hair spring
which is attached at one end to the balance cock and another end
to the balance wheel.
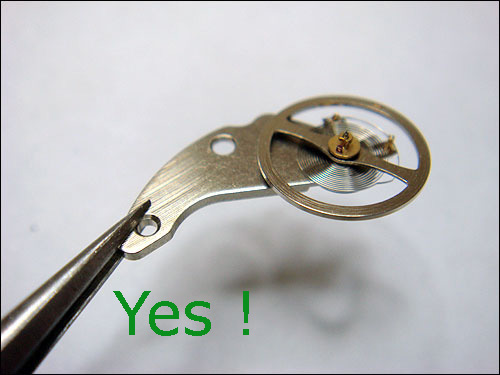
And here are couple of examples of inappropriate handling:
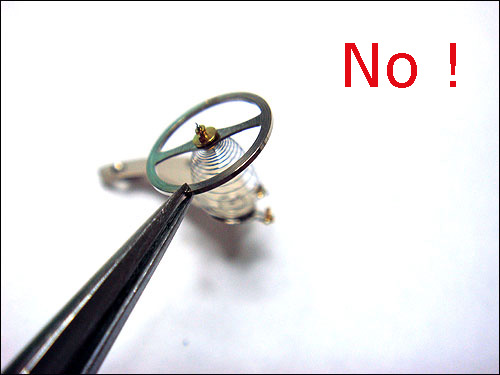
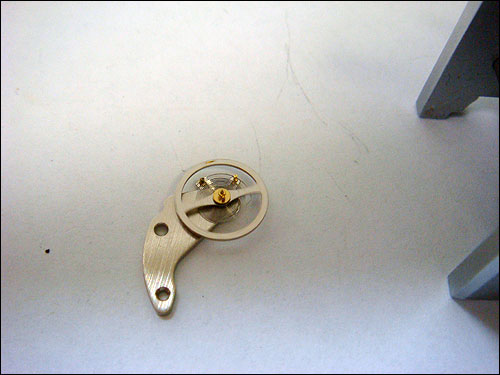
The balance wheel assembly should be placed / rest in 'cock down' position, not the other way around!
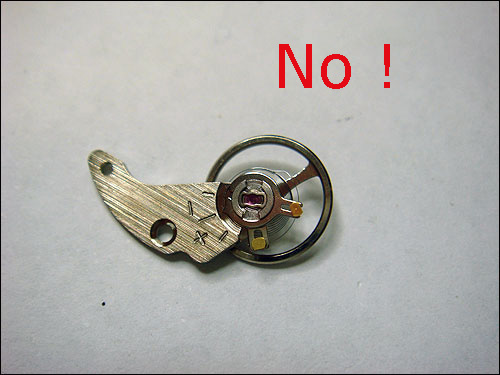
Another way of mishandling is to remove the assembly without paying
attention to the components which may be obstructing the hair spring or the balance wheel.
In other words, the hair spring or the balance wheel could be partially "tucked" under
by a nearby component like a bridge or wheel.
In the case of Seiko 7S26, the hair spring itself is not obstructed, however the balance wheel is!
It is sits partially under the 4th wheel and train bridge.

Pulling the cock directly vertically during assembly will result in deformation of the hair spring -
you will be pulling the cock up, but the balance wheel will be obstructed so the spring will stretch beyond
the point of elasticity. Again, pay attention to the images below and you'll be fine.
We will talk about the balance wheel assembly in more detail later on.
Turning the power "off"
Before we can proceed further with disassembly, we need to
unwind or uncoil the main spring. Now, if you have commenced disassembly more than 2 days ago, your
watch has stopped and the spring is already unwound. However it is important to do the following
steps regardless.
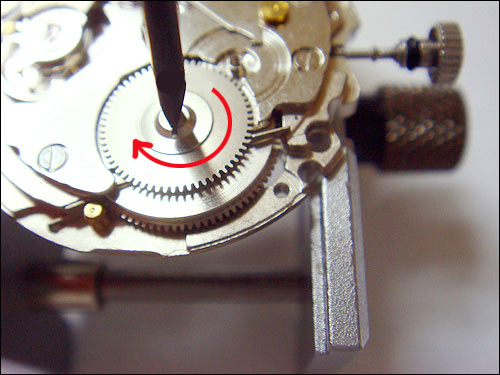
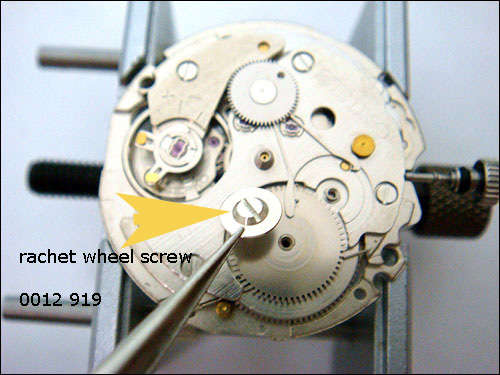
As we already know, the auto winding unit winds the spring by turning the ratchet wheel clockwise.
We can wind the clock 'manually' too, by turning the ratchet wheel screw clockwise.
It takes 8 rotations ( 8 x 360 degrees) to
wind the spring fully. However we will wind it just two turns, to get the feeling of winding action
and spring tension. So turn the ratchet wheel CW, two full rotation.
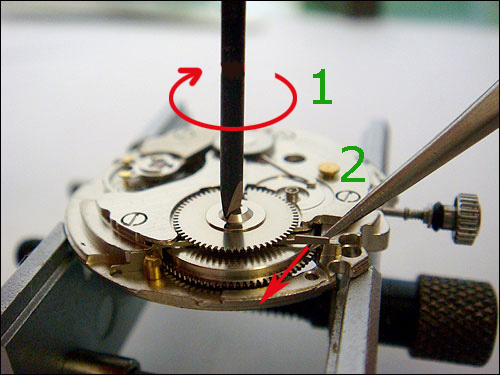
The unwinding of the main spring is a three-step process.
1. Turn the ratchet wheel for a few degrees (few clicks) and hold the tension
2. Unlock the ratchet spring by pushing it gently towards yourself until it disengages from the ratchet wheel and HOLD it disengaged with tweezers.
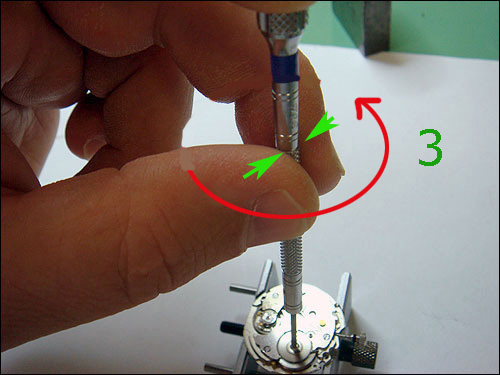
3. The spring is now trying to overcome your holding pressure by turning the screwdriver anti-clockwise. Slowly release the grip on the screwdriver body and let the spring unwind. Attention: Do not let the screwdriver turn instantly - instead control the unwinding action with the "right amount of grip."
TO DO: Repeat the manual winding action and unwinding process as described before 6 to 8 times
starting with two turns, then 3, etc. until you can confidently control release of 8 full turns (completely
wound / unwound ) main spring.
Unscrew ratchet wheel screw.
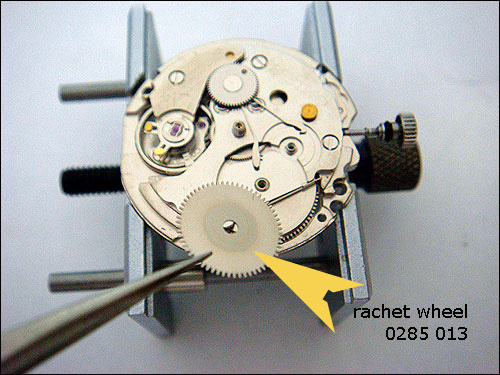
Remove ratchet wheel.
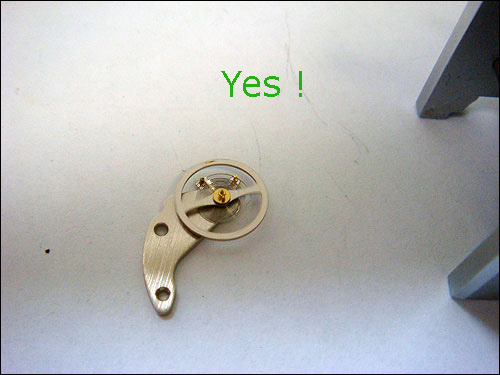
Disassembly of balance complete
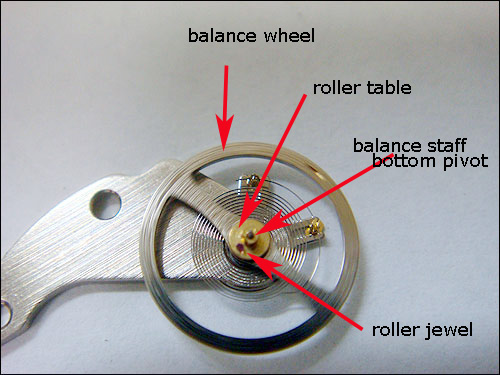
The balance cock or balance bridge is the main body of the bal. wheel assembly and it carries
all components of the assembly - the wheel, hair spring, upper jewel / shockproof assembly,
both regulating levers and studs.
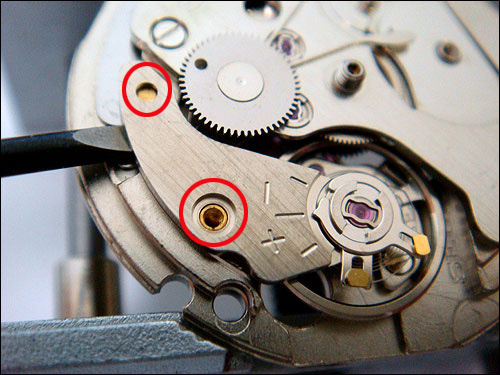
Remove balance cock screw.
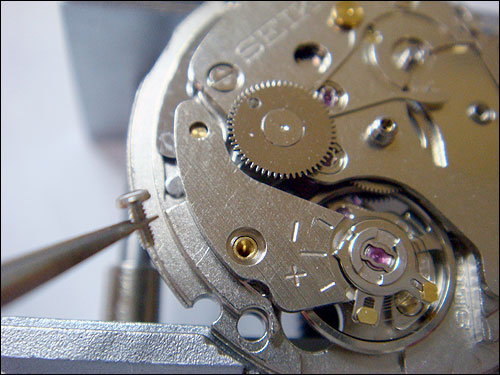
Note that the cock is held in position with two alignment studs. Place a screwdriver underneath the cock as per photo.
Twist the screwdriver to lift the cock up just enough to detach it from studs.
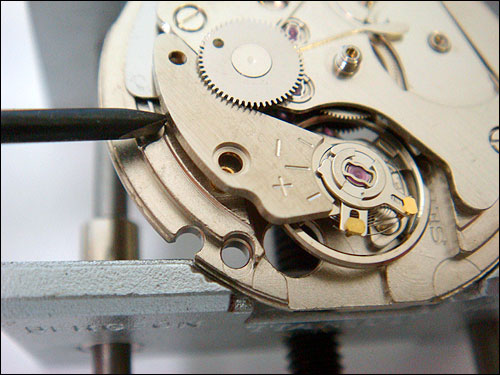
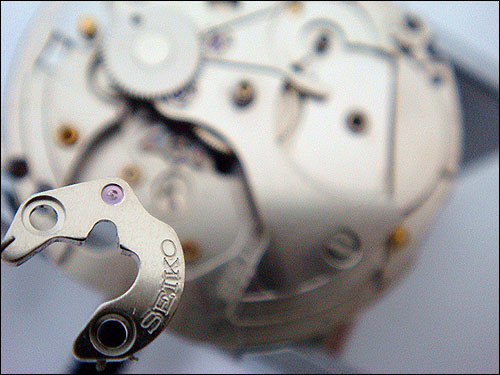
Now hold the cock with tweezers.
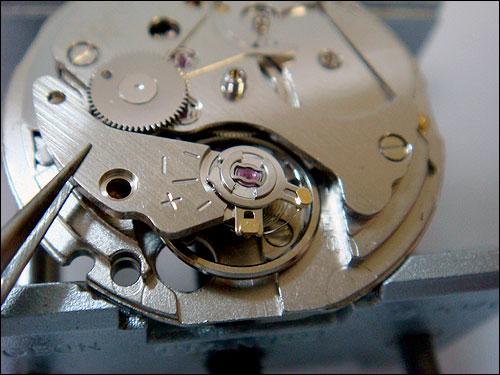
Lift the cock up for another 3-5mm.
While holding the cock 5-8mm above the main plate, rotate it towards yourself (CCW)
then back (CW) until the balance wheel is free form the lower jewel. NOTE: Do not lift
the cock too high because the balance wheel is obstructed by other components!

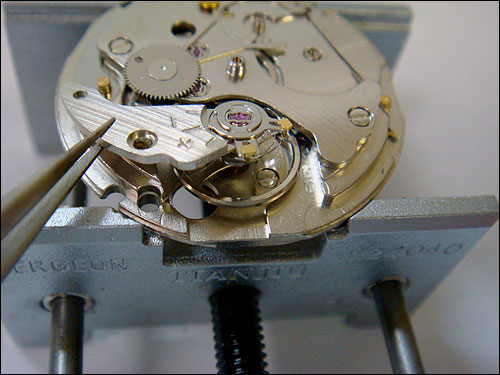
Finally, remove the cock and entire assembly by lifting it up, towards yourself.
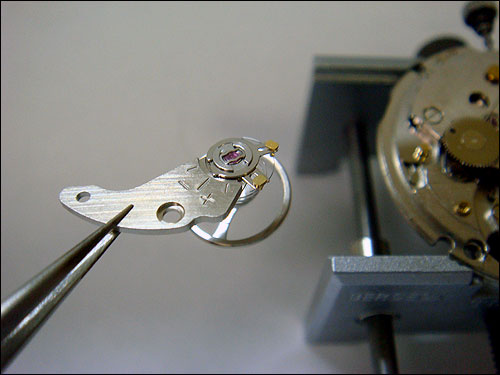
Rest the assembly as per photo.
The next step is disassembly of pallet fork.
Remove two bridge screws. 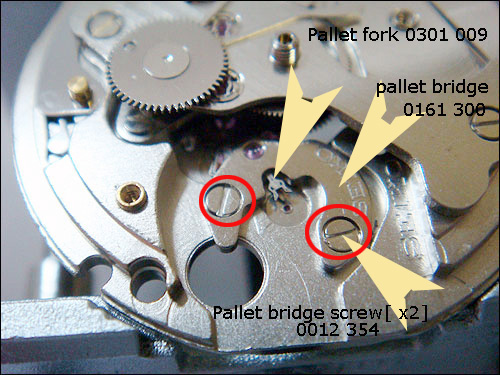
Lift the bridge as per photo. 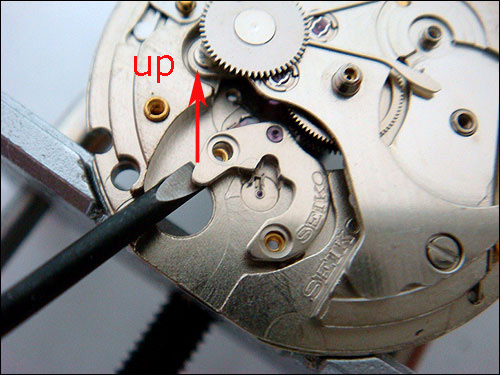
Lift the pallets form the lower jewel, up. Hold as per photo. 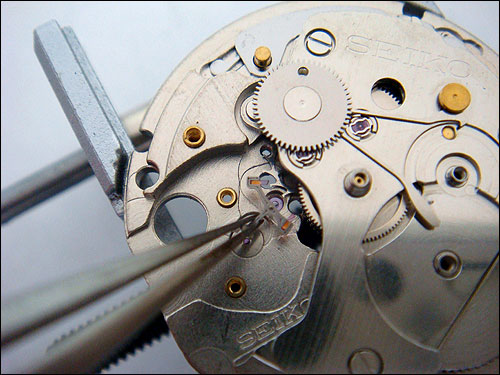
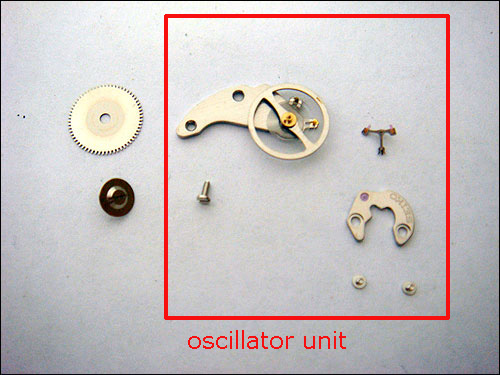
Components is oscillator unit (minus the escape wheel).
Next step is disassembly of the 'counter' unit - the main train wheels,
including the mainspring barrel.
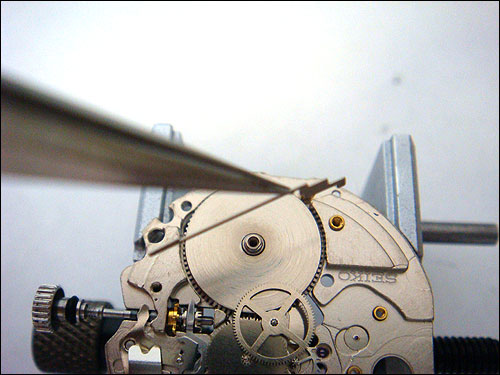
Start with unscrewing 3 bridge screws. 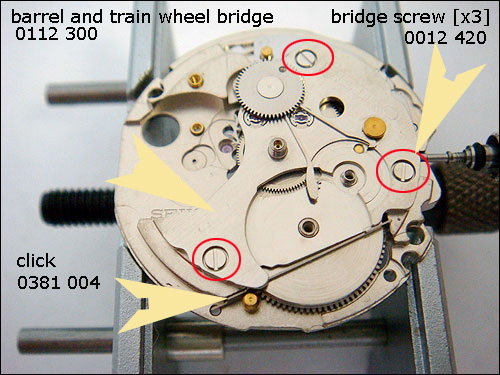
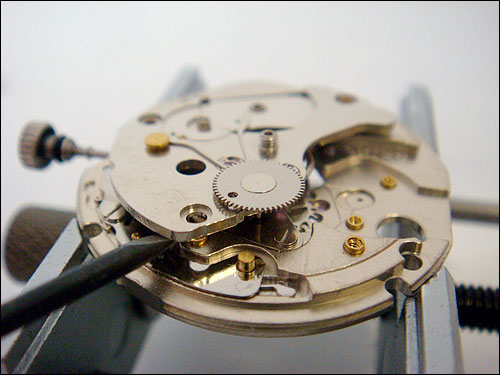
Position the screwdriver as shown and lift the bridge up, by 5mm only.
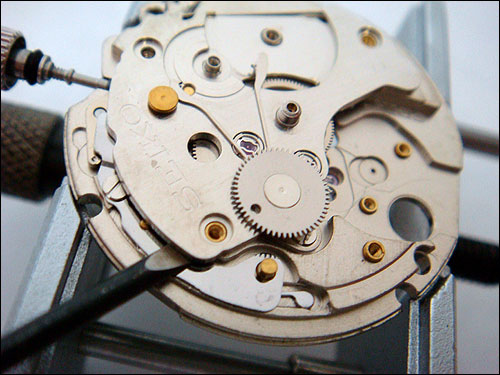
If necessary, lift the bridge from the opposite side as well.
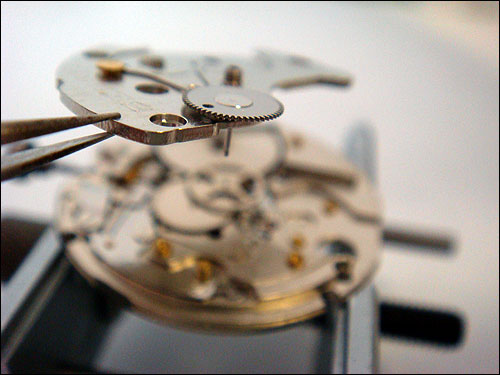
Bridge with attached auto reduction wheel and pawl. To be disassembled later. 
Mainspring barrel, click and train wheels. 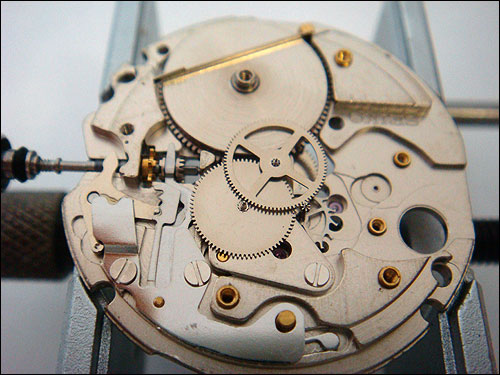
Note where the click spring is positioned. Remove it.
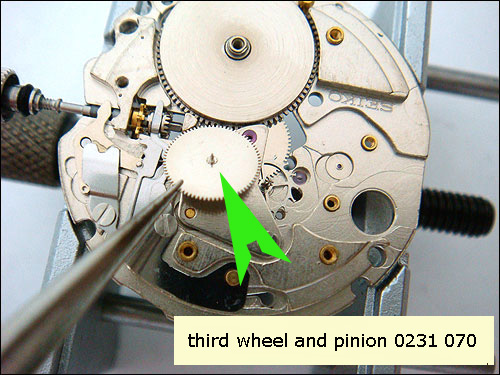
Remove the wheels in the following order, starting with the fourth wheel. 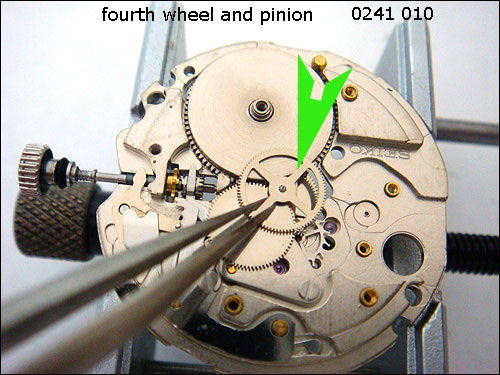
Third wheel
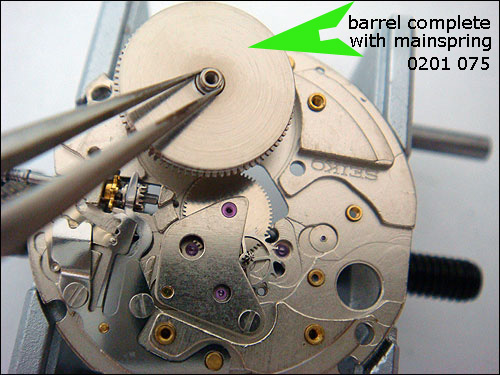
Barrel
Escape wheel. 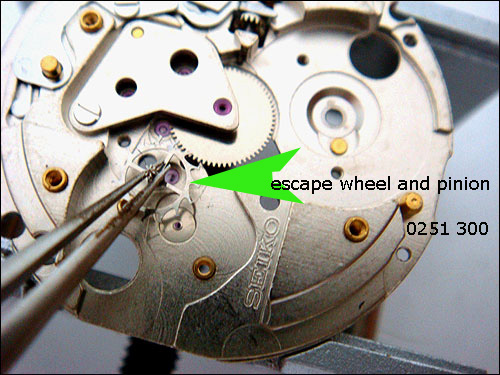
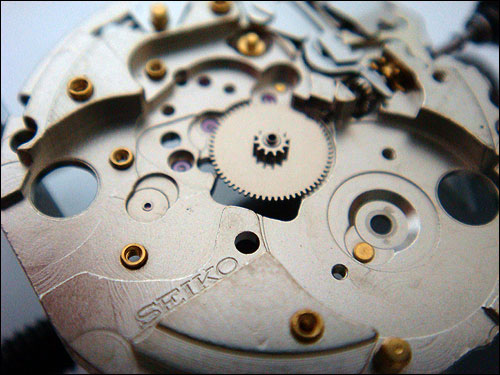
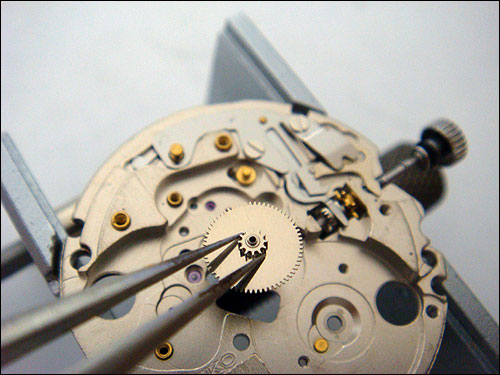
The centre wheel is held by the centre wheel bridge.
Unscrew the bridge screw, position screwdriver close to
stud and lift the bridge up. 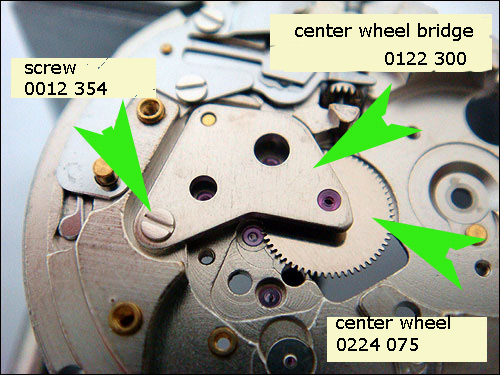
Disassemble auto winding components attached to the bridge.
Remove reduction wheel circlip (Seiko calls it "the holder") 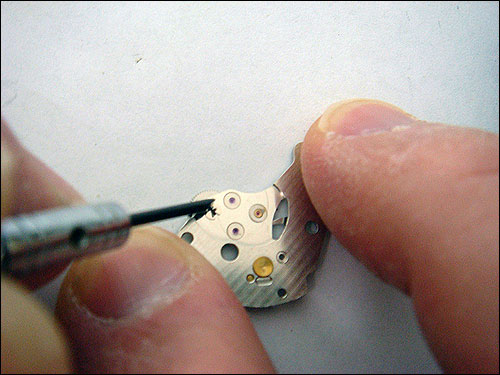

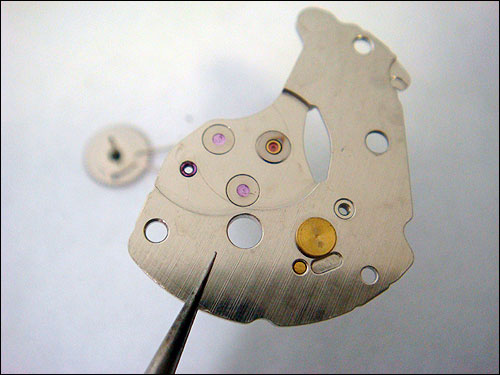
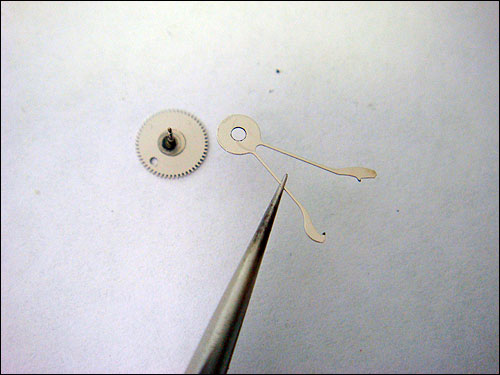
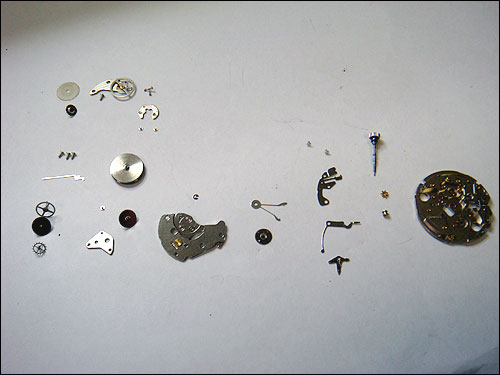
Photo showing disassembled components 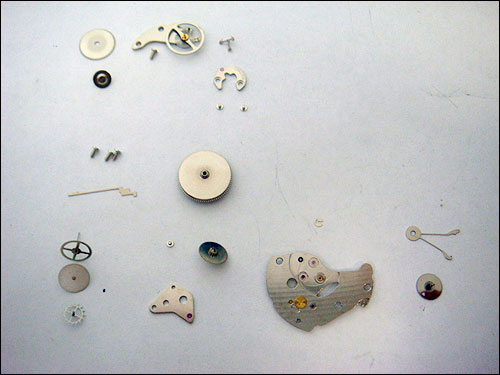
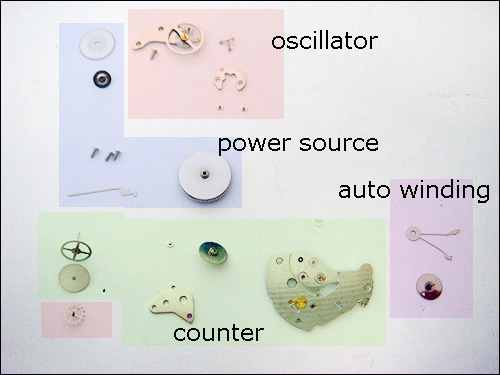
Components grouped in units.
Finally we will disassemble remaining components in the time and calendar
setting: the stem, yoke, yoke spring, setting lever and setting wheels.
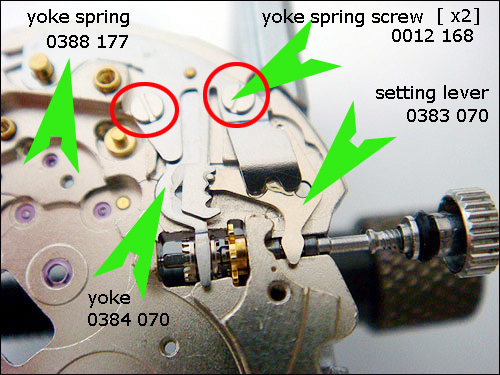
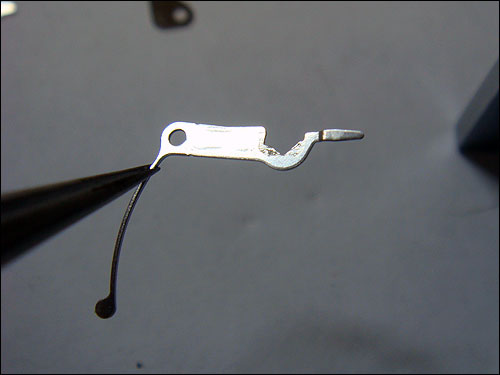
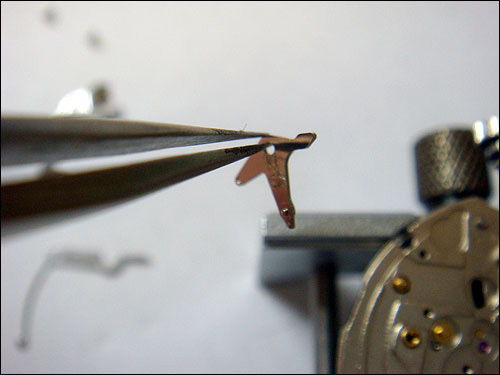
Unscrew the yoke spring screws and yoke spring. 
The yoke is held under the tension. Hold as shown on photo and lift the tail. 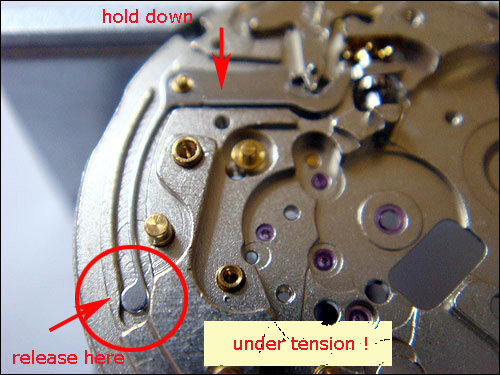
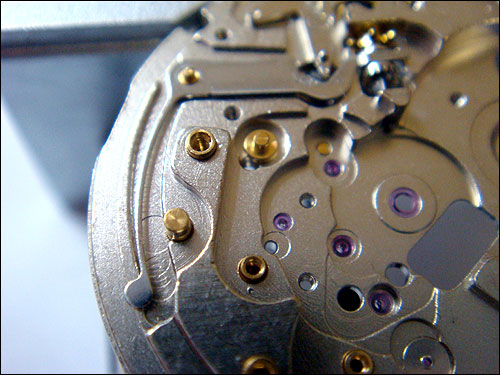
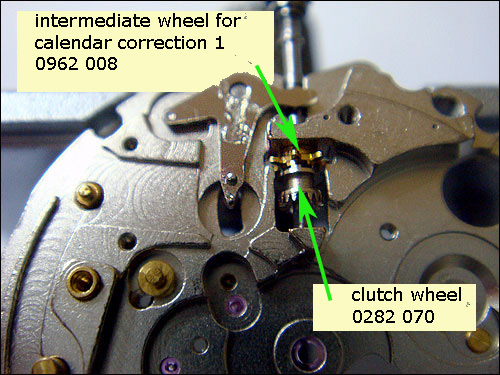
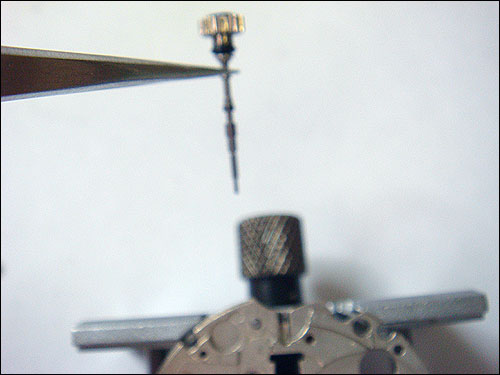
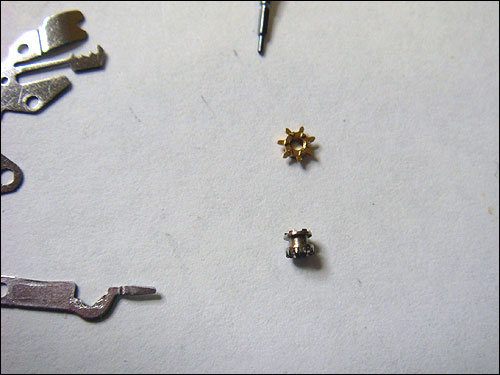
Remove the setting lever. Pull out the stem. This action will free the clutch wheel and setting wheel.
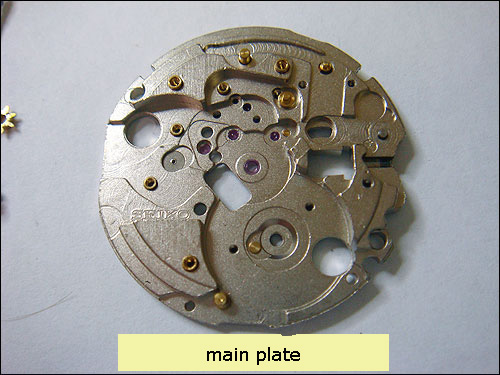
This completes the disassembly of Seiko 7S26 movement. Photo below showing components
in Phase 9.
TO DO: send me an email on nick@clockmaker.com.au
to confirm that you have successfully completed disassembly. Remember: Subject line must start with DIY.
|